
It details my not-so-successful attempt to try silicone moulding for the first time.
Yet while I'm hoping to avoid more mistakes of this magnitude, it is undeniably true that I learnt a great deal from the process. So much so that it's worth documenting it here.
But before I get into that, let me ramble on for a moment about what I wanted to achieve and why.
A few weeks ago I finally got around to playing Destiny – Bungie's impressive first-person shooter (that was two years old last month). Within minutes of starting the game I had seen something that inspired* me to start this new project.
It was right at the beginning, where you spawn for the first time outside the old cosmodrome, and was pretty much the first thing you see. Take a look at this screen shot of abandoned cars, slowly rusting into oblivion (after their owners deserted them in hopes of heading off world). I figured a few of these scrapped vehicles would make great scatter terrain for the derelict areas of my city.
At roughly the same time I also happened to be prepping some sci-fi cars that I'd bought from Antenociti's Workshop. I thought they'd look fantastic as dilapidated, rusted, old hulks, but the original models were far too nice to simply ruin like that. Instead I decided I'd try to make a silicone mould of them and cast some replacements out of plaster, which I could then hack away at as much as I liked.
I'd come close to dabbling in silicone moulding before. It was about ten years ago. I'd been thinking of casting up some scratch-built architectural features (gargoyles, doors, pillars etc.) for my Chaos town project.** I'd got as far as buying the liquid rubber, the catalyst and a mixing bucket, but then my interest fizzled out and some other idea grabbed my tiny, erratic mind.
So I still had all the stuff and could remember enough from my earlier research to know that I'd need a load of Lego from which to build the mould's frame. Luck smiled on me again as my kids had a bunch of Duplo bricks that I reckoned I could appropriate for a couple of days without them noticing.
 |
| Add in some old chopsticks for mixing, and hey presto, a complete silicone moulding kit |
The only problem was a tiny line of type on one of the silicone products that mentioned a six month shelf life.
A six month shelf life starting around the time I bought them, ten years ago.
Should I be worried? Nah, who looks at best before dates? When I see them on food packaging I take them as a guideline at best. Surely they're only there for legal reasons and to hasten repeat purchase? In my book food is ruined when it looks ruined, not when some imaginary date is passed. Besides, the liquid rubber looked fine, and even if it didn't work, what was the worst that could happen?
The worst, you say?
I was about to find out.
I added the liquid rubber into the mixing pot.
When I went to add the catalyst I noticed some of it didn't look right – it had crystallised a bit. But what could I do? Stop now and throw the rubber away? Or embrace the spirit of adventure and see what might happen?
So I built my Lego frame, put it on a large, flat piece of card and carefully placed the vehicles inside.


Then I poured in the thoroughly mixed rubber and catalyst, and went off to make a cup of tea, congratulating myself on how easy the whole process had been.
But by this point I had made two major mistakes.
The first was ignoring the shelf life, but can you see what the second was?
 |
| And I don't just mean all the air bubbles in the mixture |
Neither the Lego nor the cars were weighed down or secured to the base. When I came back five minutes later there was liquid rubber seeping out all over the place, and the cars were floating in the meagre left-overs within the frame.
I had to think quickly, so I grabbed some spare Duplo bricks and tried to build something that would hold the cars down, and take a heavy bottle to do similar with the frame itself.
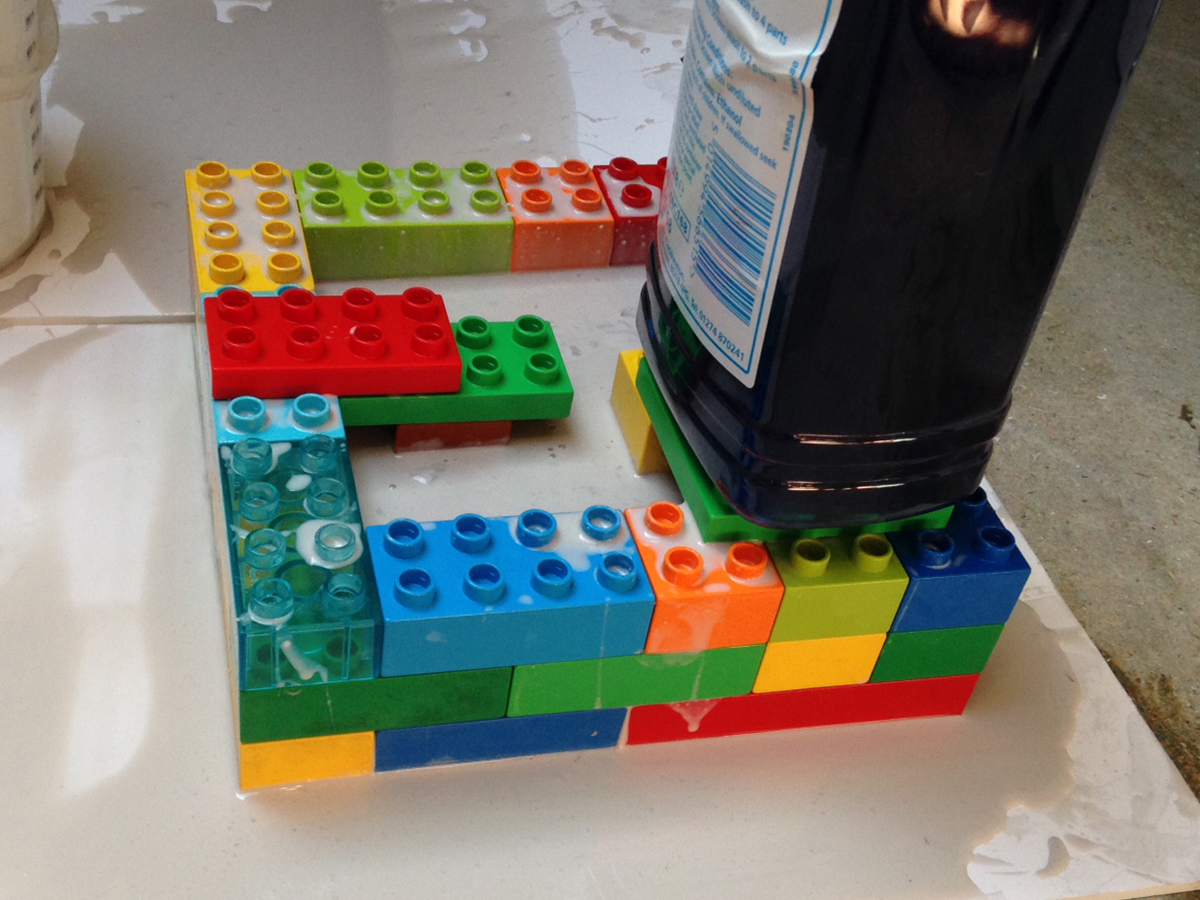
This seemed to do the job as the cars remained submerged and the frame appeared to stop leaking. I had lost a fair bit of the rubber fluid, and made quite a mess of my work area, but I figured I'd got it under control.
The instructions on the tin told me that 48 hours would be sufficient for the rubber mould to go completely solid, so I waited 2 days, popping in every now and then to check everything looked okay.
But at the end of that time the liquid rubber had not even got the slightest bit thicker. It was still a consistency somewhere between thick paint and runny yoghurt. The sell-by date was well and truly passed.
I was prepared to chalk it up as a long-shot that hadn't paid off, except there was now an awful lot of liquid rubber covering an awful lot of toys, tools and space. And most of those toys didn't even belong to me (all that Lego belonged to the kids, remember). And to make matters worse, the liquid rubber behaved just like thick, oil-based house paint. It's designed to be peeled off once it goes hard, but it's infinitely more difficult to clean when still a liquid.
In fact it was only when starting the clean-up that I realised it would take hours of careful scrubbing to return everything to its original condition.
To cut a long story short, the process of clean-up took me about six or seven hours, involved soaking everything in buckets of white spirit, used up an entire roll of kitchen paper, necessitated me throwing a lot of stuff away, and left the floor of my work space quite badly stained.
On the plus side however, the kids' Duplo now looks really clean.
And if I ever decided to do this again I'll know the importance of gluing my subject models to the base and weighing the frame down with something very heavy.
But did I want to do this again? The way I saw it I was faced with three possible ways to continue:
1) Scrap the whole project and never mention it again.
2) Start again from scratch, buying fresh silicone rubber materials, and use my new-found experience to get it right.
3) Find a completely different way to achieve the same goal.
After discovering the price of a new silicone moulding kit – something like £30 or £40 – I was pretty convinced number 2 was off the list. And 1 just sounds like defeat, so number 3 it was.
Armed with just £2 in my pocket I headed to the nearest Pound Shop where I was able to buy some toys that might just prove to be perfect for this job. If all goes according to plan it will give me four, lovely wrecked vehicles for my sci-fi city terrain, all in roughly the same scale as the original Antenociti's Workshop kits.
 |
| In fact the only downside is my recent track record regarding plans. Specifically with events not going according to them |
I'm looking forward to tackling this brand-new project in the near future. I'll document any further failures here. As they say "I've learnt so much from my mistakes, I'm thinking of making a few more".
*I've been inspired by Destiny before. The concept art and screen shots sparked me into making some mercenaries and gunslingers that might be found in the bars and cantinas of Kru. You know the kind of places, wretched hives of scum and villainy. There's clearly something about the aesthetic of Destiny that appeals to my inner model maker.
**Which, despite repeated mentions, I still haven't managed to share on this blog.
No comments:
Post a Comment